When you’re in the backcountry or camping out at a campsite, a tent is way more than just some fabric and poles – it’s a carefully designed system that keeps you out of the wet stuff, bug-free and actually comfortable, no matter what the weather throws at you. Understanding each part makes setting up a breeze, helps you pick out a good one when you go shopping, and lets you keep your gear in good nick so it lasts through many seasons.
This guide walks through the main bits of a typical camping tent, from the core structure right down to the smaller details that make a big difference. If you’re new to camping or just want to get a clearer picture of how everything fits together, knowing these elements is something that will pay off every single time you pitch your shelter.
Table of Contents
Why Knowing What’s Inside a Tent Matters
A tent with parts you don’t recognise can turn what should be a simple setup into a real puzzle, especially when the wind starts howling or the rain starts coming down. Knowing your way around helps you pick a model that’s right for your trips.
It also makes maintenance a lot easier: you can spot a worn out guy line before it fails, or understand why condensation builds up when the vents get left closed. Think about where you usually go camping (wet springs, buggy summers, windy fall trips and so on) and match up the features on the tent with those realities. The right knowledge turns gear selection from a bit of a guess into a smart decision.
The Main Bit: Body, Poles & the Rainfly
At the heart of any tent is the inner bit, often called the canopy or inner tent. This is where you sleep and store your gear, and it’s usually made from breathable nylon or polyester to let moisture escape while keeping the bugs out with mesh panels. The floor is generally sewn in and treated to prevent water seeping up from the ground.
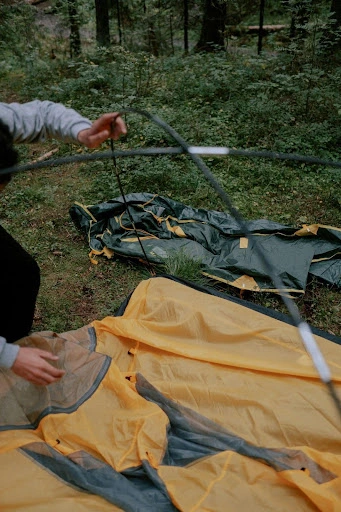
Supporting that body are the poles, which create the shape and hold everything upright. They come in aluminium for lightweight strength or fiberglass for affordability, though aluminium handles wind better without snapping. They connect through clips, sleeves or colour-coded hubs that snap together pretty quick. A hub system – which is common in dome-style tents, links multiple poles together at a central point for easier pitching.
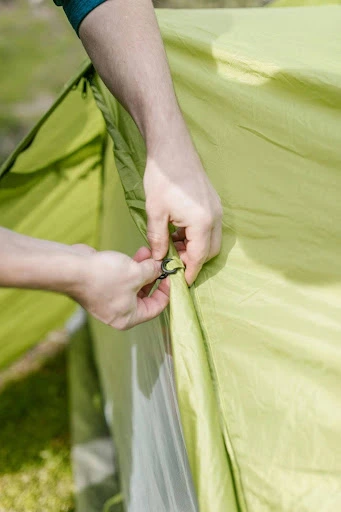
Over the inner bit goes the rainfly, the waterproof outer layer that keeps rain, snow or heavy dew off you. It usually covers the whole tent or most of it, leaving a small gap that stops condensation from soaking the inner fabric. Full-coverage flies add better storm protection, while partial ones save weight for backpacking. Look for taped seams and sturdy zippers that are covered by storm flaps to keep water out.
Getting It Down on the Ground
No tent stays put without a solid connection to the earth. The groundsheet, which is sometimes a separate footprint and sometimes built into the inner tent floor, protects against sharp rocks, roots and ground moisture. A dedicated footprint will extend the tent’s life by taking the wear and tear instead of the main floor.
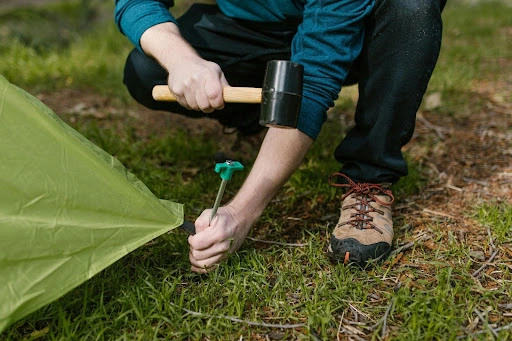
Stakes (or pegs) anchor the tent corners and rainfly edges. Standard steel or aluminium stakes are fine for firm soil, but sand or loose gravel calls for wider, longer stakes or even deadman anchors made from rocks or buried gear.
Guy lines, the thin cords that go out to the rainfly or body, extend out to additional stakes or trees. Adjustable tensioners let you pull them tight without over-stretching the fabric, which adds stability in gusty conditions and helps the rainfly shed water instead of it all pooling up.
Features That Make Camping a Bit More Civilized
Vestibules are the covered areas outside the main doors, perfect for stashing muddy boots, cooking in the rain or keeping packs dry. Larger car-camping tents often have good-sized vestibules on both sides, while ultralight backpacking models keep them simple to cut weight.
Ventilation comes from mesh panels in the inner tent and adjustable vents in the rainfly. These openings let moist air out, which prevents that clammy feeling inside on warm nights. In bug season, mesh doors and windows keep insects out while still letting breezes in.
Inside, storage pockets sewn into the walls keep headlamps, phones or maps within easy reach. Some tents come with gear lofts (mesh shelves suspended from the ceiling) for lightweight items like glasses or socks. Internal hooks let you hang a lantern or run a clothesline, and door tie-backs keep entries open for airflow without the fabric flapping around.
Specialized Tricks for Toughest Conditions
Storm flaps are strips of fabric that cover zippers on the rainfly, often secured with Velcro or toggles to block wind-driven rain. Pole attachment points can vary – clips slide on easy and allow quick adjustments, while continuous sleeves create a smoother profile but can be trickier in high winds.
Not every tent has every feature. A minimalist backpacking shelter might skip the vestibule and gear loft to shave some ounces, while a family cabin tent adds dividers for privacy and multiple doors for easy access. Repair kits sometimes come with the tent, with patches for tears and spare pole sections for breaks.
Shopping for (and Caring for) Your Tent
Pick a tent that matches the kind of trips you usually go on – you’ll want to check out how well the poles can hold up, how much the rain fly covers , and how well it ventilates when things get really wet outside. Figure out what kind of weather you’re probably going to run into & go from there.
After your trip, dry out every last bit of the tent before you start packing it away to make sure you don’t end up with mold. While you’re at it, take a good hard look at the seams & guy lines to see if any of them are starting to wear out. The final piece of advice is to store it in a big breathable bag, not all bunched up as a cramped tight in a small sack is basically asking for problems.