Imagine this: you’re miles into a rugged trail, surrounded by tall pines, when disaster strikes – your tent pole snaps in a gusty wind or your backpack strap tears and your trip is about to go sideways. Gear failures like these can turn a great hike into a miserable slog. But with a compact trail repair kit, you can patch things up on the spot and keep moving. No need to retreat or abandon your adventure.
Now that you know why carrying a repair kit is so important, let’s take a closer look at what goes inside. This guide covers what to pack in a lightweight kit, why gear fails, how to make quick repairs, and tips to get the most out of your kit.
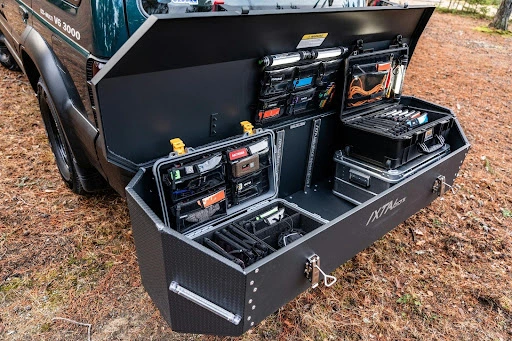
Table of Contents
What Should You Put In Your Trail Repair Kit?
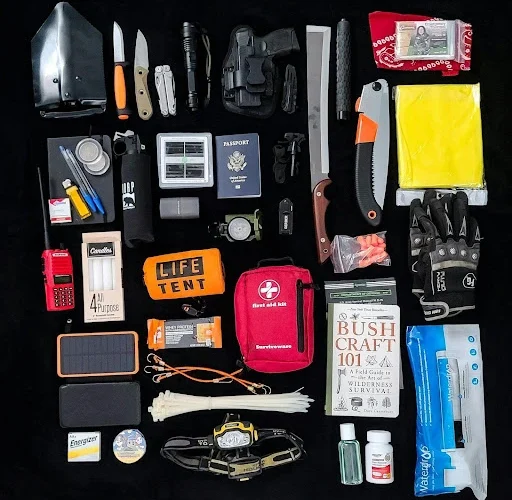
Your repair kit should be small, under half a pound, and versatile enough to handle multiple gear issues without weighing you down. It should also fit in a small pouch so you can pull it out when trouble hits.
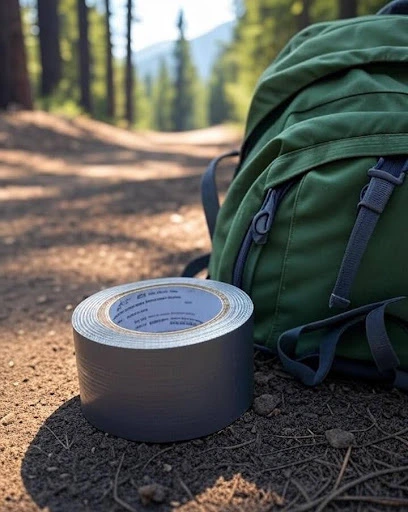
Start with duct tape, but not the cheap stuff. Go for heavy-duty, waterproof tape and wrap a few feet around a trekking pole or water bottle to save space in your pack. It’s perfect for patching torn tents, sealing leaks in sleeping pads or splinting broken poles. Its strength and flexibility make it a must-have for quick fixes.
Include a multi-tool with pliers, a small blade, scissors and a screwdriver. This tool tackles tasks like bending wire, cutting cord or tightening loose screws on gear. A compact model keeps weight down but still gets the job done.
Cordage is another important item. Pack about 20 feet of paracord (550 cord) or bank line. It’s strong, lightweight and perfect for lashing broken poles, replacing straps or rigging a shelter.
Include zip ties in various sizes for loose parts, safety pins for clothing fixes and a couple of binder clips to clamp patches or hold gear in place. These add minimal weight but solve a range of problems.
For fabric and seam repairs, pack adhesive patches like Tenacious Tape or Gear Aid patches that stick to outdoor materials like nylon or Gore-Tex even in wet conditions. Add a small tube of Seam Grip or Aquaseal for waterproofing seams or gluing boot soles. A basic sewing kit – needle, thread (dental floss works as a strong substitute), and a few buttons or buckles – handles tears in clothing or packs.
Round out the kit with extras: rubber bands for bundling or tensioning, spare batteries for headlamps or GPS devices and a short length of bailing wire for rigid fixes. In areas with questionable water sources, a dropper of bleach can be a backup purifier. The whole kit should cost under $50 if you shop smart – check marketplaces like Everest for durable options.
Customize your kit to your gear. If you use inflatable sleeping pads, prioritize patches. For leather boots, include shoe goo. Store-bought kits often include items you might not need, so building your own ensures it matches your style. Test your setup on a short trip to check every item works for you.
What Are Some Common Hiking Gear Failures?
Gear fails for predictable reasons: wear, weather or misuse. Knowing these helps you spot issues early or avoid them altogether. Here are the most common problems hikers face.
Tents are trouble prone. Poles break in high winds, especially cheap aluminum ones. Zippers get stuck from dirt or wear and fabrics tear on rocks or branches, letting in rain or bugs.
Backpacks take a beating too. Straps fray under heavy loads, buckles snap from repeated use and seams split if the pack is overstuffed. These issues can make carrying your load painful or unbalanced.
Footwear fails in tough conditions. Boot soles delaminate in wet environments, laces break and uppers tear on rocky terrain. Wet boots can weaken glue or develop mold, speeding up wear.Sleeping pads spring leaks from punctures (thorns or sharp rocks) or faulty valves. Puffy jackets and sleeping bags develop holes, losing insulation. Water filters clog with sediment, stoves fail if not cleaned and trekking poles bend or lose tips on uneven ground.
Electronics like headlamps or GPS units can fail too – switches break or batteries drain faster in cold weather. Even water bottles can crack in freezing temperatures.
Most issues come down to moisture, abrasion or material fatigue. Wet trails erode boot treads, UV rays weaken fabrics and rough handling stresses zippers or seams. Regular checks for frayed threads or loose parts can prevent bigger problems but when failures happen your kit is your lifeline.
Some Quick Gear Repairs For The Trail
When gear breaks, quick action saves the day. These step-by-step fixes are for trail conditions – no fancy tools needed. Work in a sheltered spot if possible and stay calm to avoid mistakes.
Broken Tent Pole: Check the break. If it’s clean, align the ends. Use a repair sleeve (often included with tents) over the break; if none, wrap duct tape tightly around the pole and add paracord as a splint. Cut two short cord pieces, place them along the pole like braces and secure with more tape or zip ties. Test by gently flexing – it should hold for temporary use.
Jammed Zipper: Don’t force it. Apply lip balm or soap (if available) to lubricate then wiggle gently. For bent teeth use pliers from your multi-tool to straighten. If the track splits use a safety pin as a temporary pull then sew later.
Backpack Strap Failure: For torn webbing thread paracord through the buckle and tie a secure knot (a bowline works well). If the buckle’s broken, use zip ties to attach a spare or create a cord loop. For torn seams apply Tenacious Tape on both sides and press firmly for a strong bond.
Boot Issues: Peeling sole? Clean the area, apply Aquaseal or Shoe Goo and clamp with binder clips or heavy rocks overnight. For torn uppers, patch with tape or sew with needle and dental floss (pre-puncture holes for ease). Broken laces? Use paracord, melt the ends to prevent fraying.
Sleeping Pad Leak: Inflate to find the hole (listen for hissing or use soapy water). Clean the area, apply a patch and press hard – use your body weight for a tight seal. For valve leaks tape over temporarily.
Puffy Jacket Hole: Push the escaping insulation back in then seal with tape.
Other Gear: Clogged water filter? Backflush if possible or use bleach drops. Stove not working? Clean out the individual flame jets with a needle from your sewing kit. For trekking poles straighten a bent section against a firm surface and splint with tape and wire.These are temporary fixes but good enough to get you to the end of your trip.
Practice at home first. Trying a repair for the first time in a storm isn’t fun. Keep your kit accessible, not buried in your pack.
Final Thoughts
A trail repair kit isn’t just gear—it’s your ticket to staying out there, no matter what breaks. With a lightweight, custom kit and a few practiced fixes, you can handle surprises and keep your adventure on track.